
Initial Setup & Building a Customer Database with MySQL
Building our mysql database that mimics a real world company's transactions


This article is part of the Practical Growth Hacks series, where we are going to explore the following topics:
- Coding Skills:
- Essential Growth Metrics & Models:
Customer Activation Strategy
Customer Churn Prediction
Customer LTV Prediction
Booking/Transaction Prediction
AB Testing & Sample Selection
Recommendation Engine
Marketing Mix Model
Market Basket Analysis
Hey fellow growth hackers and data folks,
This post will cover how to build a database that we are going to use for the rest of our journey. Just to give you a background, everything we’ll do after this article will be tied to this database. It will consist of the following:
User data
Booking data
Imagine you are working for a company like Uber or Doordash where your customer registers (hence it builds up our user table) and books services (translates into our booking table). The database I’ve provided is a complete synthetic dataset, validated based on my domain knowledge. A disclaimer I have to do at this point is that if you go deep into the data and make a complex analysis, you might face some inconsistencies. But for all the exercises we are going to do together, I’ll ensure there is no discrepancy.
Also, why do we go through this and build a database? Because whichever company you are working at, if you focus on B2C growth, you will work with data. Any experimentation you want to conduct or business insight you are going to generate will need data work. Moreover, especially in startups, nobody will provide you a clean dataset that you can work on. First you should know how to query this data. In our example, we will explore querying with MySQL and Python.
Let’s get our hands dirty. Before we start all of this, first, you have to install MySQL database on your local machine. I’ll go through it one by one:
MySQL Setup
1- You can download the latest MySQL packages for free here.
2- After that, you can follow the instructions for Mac and Windows.
3- Next, you should activate MySQL. Mac Example:
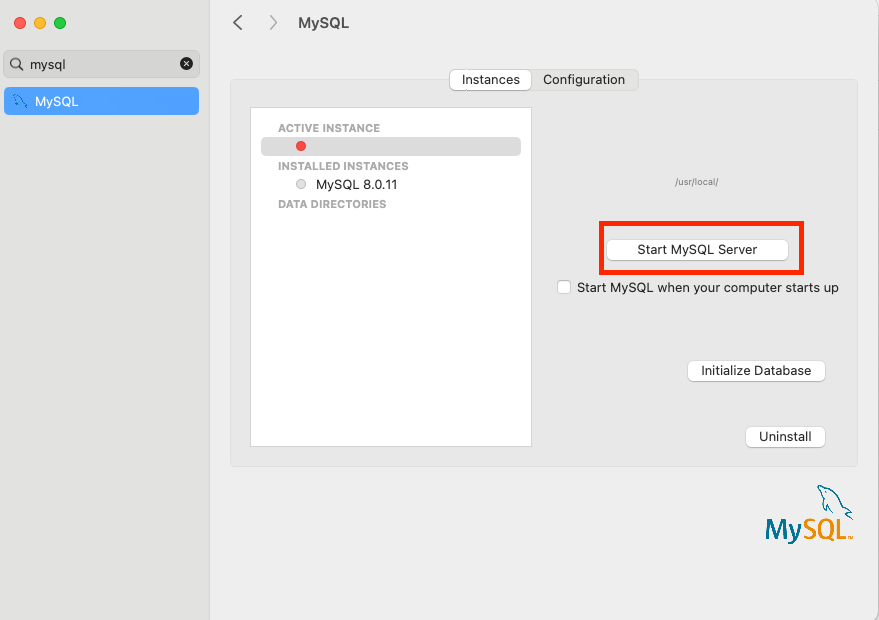
For Windows, you should use this command on command prompt:
C:\> "C:\Program Files\MySQL\MySQL Server 8.0\bin\mysqld"Installing Python and Anaconda
After launching our MySQL server, it is now time to build our coding environment. To do so, we have to install Anaconda, which will help us launch a virtual environment. That environment will be our core infrastructure to install Python and Jupyter Notebook. All our work, including any coding exercise and analysis will be done on Jupyter Notebooks interface.
1- Let’s start with installing Anaconda. It is quite straightforward to download their official package here. You can install the package after clicking on the file.
2- Next, it is going to open the Anaconda interface like below, which you can ignore and close.
3- Then, you should open your command prompt or terminal, and type the following:
conda create -n myenv python=3.9You can use any name instead of myenv.
4- After creating the environment, you should activate it with the following command:
conda activate myenv5- The next thing we will do is installing jupyter notebooks. A simple command below will handle that:
pip install notebookand we will launch our notebook:
jupyter notebookThis will launch the Jupyter Notebook interface in your preferred browser.
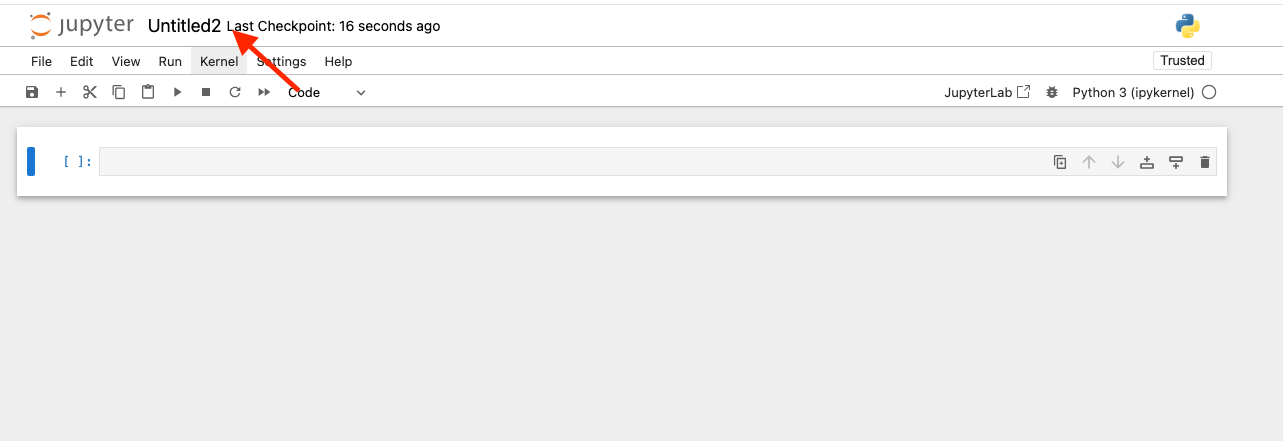
In that interface, simple follow the steps below to create a new notebook:


and voila, you have your environment ready. You can change your notebook name by clicking on it:
Now we will start coding. If you have no experience with SQL or Python, no worries at all. Please proceed to the following post after setting up the database.
Building the Database
Creating tables on MySQL with Python will be quite easy to follow since I am going to share everything you need now. For building the database, you only need the CSV files and code blocks below:
1- Before we start coding, we have to import the Python libraries that we are going to use in our exercises. We will start with pandas. Panda is a library that has lots of useful features that you will use while manipulating and analyzing the data.
To install the library, you have to type the following and hit run:
!pip install pandasThis is a one-time thing, for any project after installing the library, we will do the following and start using it:
import pandas as pd